Quick Answer
Want fresh herbs on your balcony but don’t have space? Learning how to make vertical garden using plastic bottles is the perfect solution for Indian apartment dwellers. You can create this space-saving garden by cutting drainage holes, filling with quality potting mix, and mounting securely on walls or railings. This plastic bottle vertical garden DIY method transforms any Indian balcony into a productive herb garden for under ₹500 in just one weekend. No previous gardening experience needed!
Introduction
Honestly, I used to think growing plants in my Mumbai apartment was impossible. Last year, I stared at my tiny 4×6 feet balcony feeling completely frustrated. Like millions of Indians living in cramped apartments, I dreamed of fresh mint for my morning tea and coriander for dal, but had zero floor space for traditional pots.
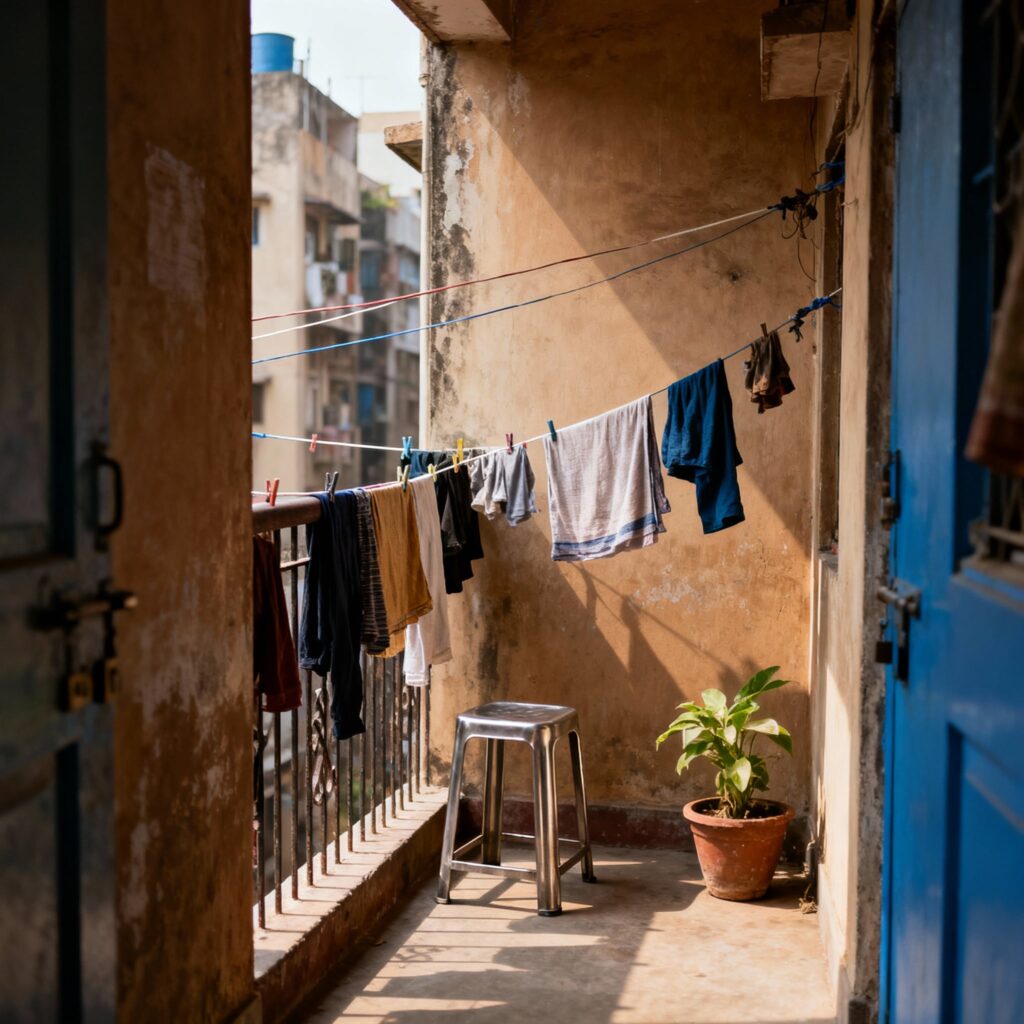
That’s when my neighbor aunty showed me something amazing – she was growing herbs in old plastic bottles hung on her wall! It was like discovering magic. Why had nobody told me about this before?
Plastic bottles are honestly the perfect solution for Indian apartment gardening. Think about it – they’re completely free (we throw away so many!), take up zero floor space, and give you that satisfying feeling of recycling waste into something useful.
This guide is specifically written for absolute beginners who’ve never grown anything before. Whether you’re a college student in Delhi sharing a hostel room, working professional in Bangalore with a tiny balcony, or a homemaker in Chennai wanting fresh herbs, these recycled bottle planter ideas for an apartment will work perfectly.
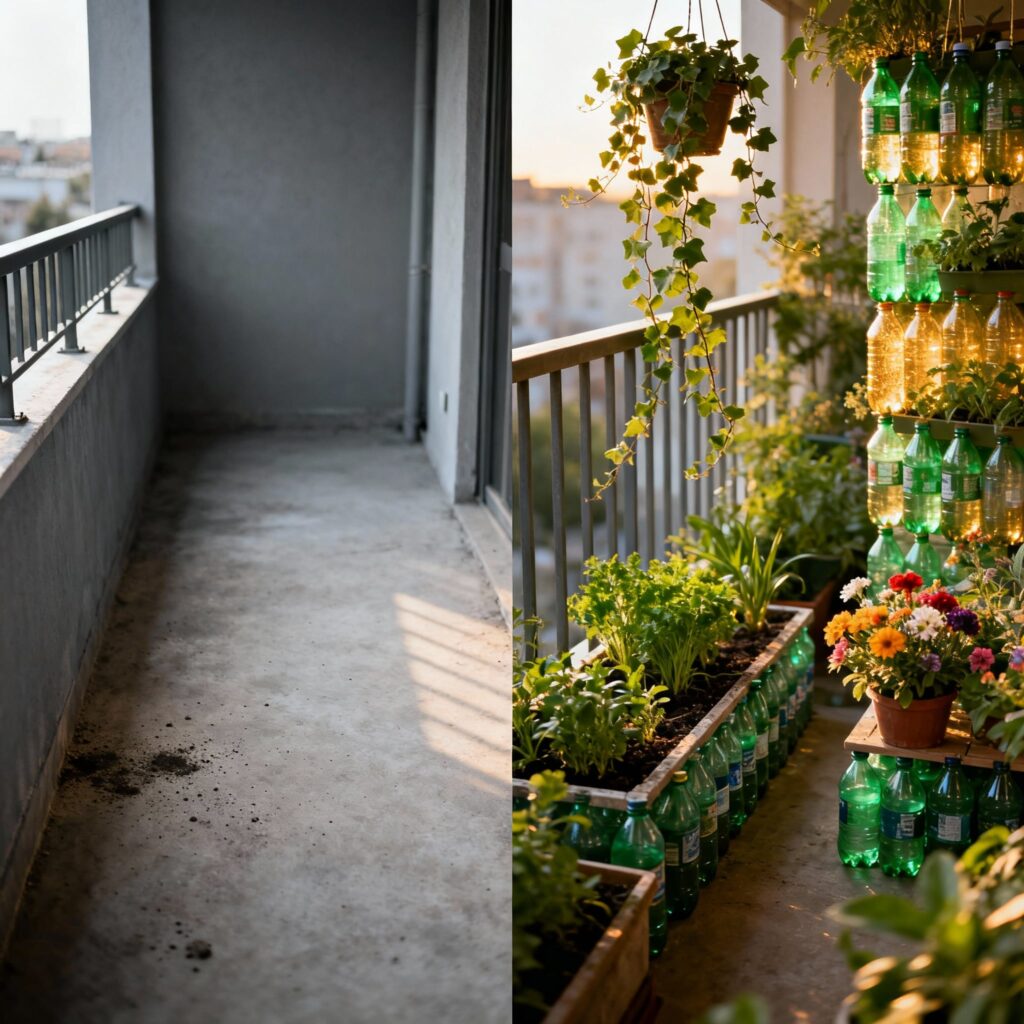
I’ve personally tested every single method in this guide on my own balcony during Mumbai’s scorching summers and flooding monsoons. After growing over 15 different plants in bottles (and killing quite a few while learning!), I’m sharing exactly what works and what doesn’t in real Indian conditions.
Trust me, if I can do this in Mumbai’s crazy weather, you can definitely do it in your city too!
What You’ll Actually Build This Weekend
Let me be completely honest about what you’re getting into:
Size: 1m x 1m vertical panel that holds 10-12 bottles
Setup Time: One weekend afternoon (2-3 hours), then just 15 minutes daily
Growth Timeline: Seeds sprout in 7 days, first harvest in 21-30 days
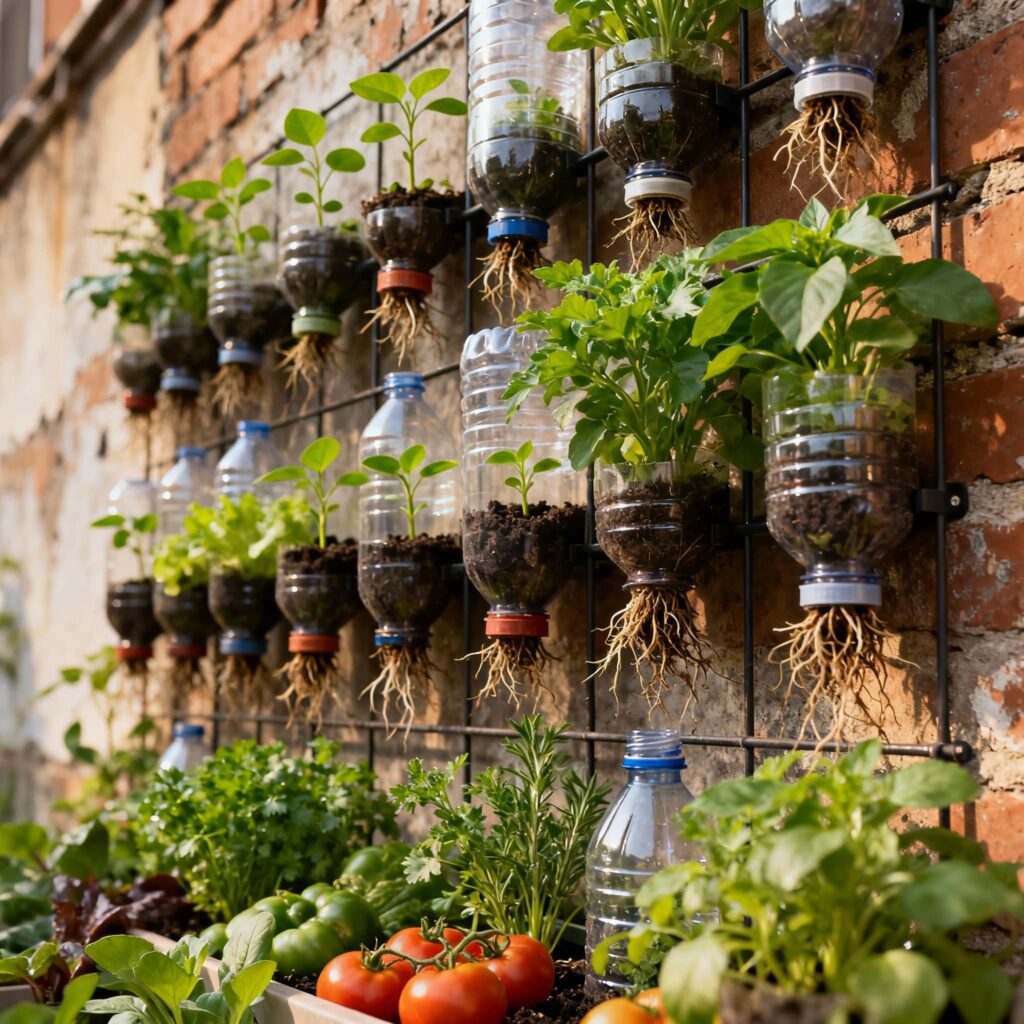
Real Cost Breakdown (I’ve Spent This Money):
- Super Budget: ₹300-450 (basic materials, free bottles)
- Good Quality: ₹600-900 (better soil, proper tools)
- Premium Setup: ₹1000-1500 (drip irrigation, fancy mounting)
What You’ll Actually Harvest:
Once your plants are established, expect 2-3kg fresh herbs monthly. I calculated this – that’s ₹400-600 worth of store-bought herbs! Plus, the taste is incredibly better than market vegetables.
Plants That Actually Work:
I’ve tried growing everything from roses to huge tomatoes (spoiler: epic failures!). Here’s what actually thrives:
- Herbs: Mint (पुदीना), coriander (धनिया), basil (तुलसी)
- Leafy greens: Spinach (पालक), lettuce, fenugreek (मेथी)
- Small vegetables: Cherry tomatoes, green chilies
Space Magic: This setup replaces 6-8 traditional pots but uses just 1m² of wall space!
Everything You Need to Buy (Real Shopping List)

Essential Shopping List (With Actual Prices):
- 12-15 plastic bottles (2L PET bottles) – Free from collection/₹60 if buying
- Premium potting soil mix (15kg bag) – ₹200-300 (I recommend brands like Ugaoo)
- Organic vermicompost (5kg) – ₹150-200
- Cocopeat (2kg compressed block) – ₹80-120
- Seeds/seedlings – ₹100-150 (start with herb seeds)
- Strong nylon rope – ₹80-120 (6mm thickness works best)
- Electric drill with bits – ₹300 (or borrow from neighbor/₹50 daily rent)
- Waterproof plant markers – ₹30

Money-Saving Hacks I Actually Use:
This is how I collected 20 bottles in just one week:
- Office water coolers (asked security guard)
- Neighbor’s recycling
- College canteen (they were happy to give!)
- My own family’s consumption (we drink a lot of packaged water)
Other Smart Savings:
- Kitchen waste compost instead of buying vermicompost (saves ₹150)
- Old newspapers for mulch instead of cocopeat
- Seeds from fresh vegetables (tomatoes, chilies work great)
My Tested Soil Recipe That Actually Works:
After trying expensive soil mixes and cheap garden soil, this combination works best in Indian climate:
- 40% regular garden soil (₹50 for 10kg)
- 35% vermicompost (kitchen waste or bought)
- 25% cocopeat or river sand for drainage
- 1 handful neem powder (prevents pests naturally)

Safety First – Don’t Make My Expensive Mistakes!
Before you start drilling holes in walls, please learn from my costly errors!
Weight Reality Check:
Each filled bottle weighs 2.5-3kg. I learned this the hard way when my first setup collapsed at 2 AM during monsoon, waking up the entire building! Total panel weight: 30-35kg.

Critical Safety Steps:
- Check your balcony’s load capacity (ask building management)
- Distribute weight across multiple points, never concentrate on one spot
- Use wall anchors rated for 50kg+ (don’t use those small plastic ones!)
Balcony Safety (Especially Important):
- Railing mounting: Ensure bottles can’t fall on people below (legal liability!)
- Wind protection: Coastal cities like Mumbai, Chennai need extra securing
- Rental permissions: Get written approval for drilling (learned this lesson too!)
Sunlight Planning That Actually Matters:
This step determines success or failure. I spent two weeks tracking sunlight on my balcony using a simple method:

Sun Tracking Method:
- Mark sunlight spots every 2 hours for one full day
- Minimum needs: 4-6 hours for herbs, 6-8 hours for fruiting plants
- Seasonal changes: Sun angle changes throughout year
- Heat protection: Plan shade for brutal 11 AM – 3 PM summer sun
Step-by-Step Building Process
Step 1: Preparing Bottles (Don’t Rush This!)
Time needed: 45 minutes for 10 bottles
Tools: Sharp craft knife, electric drill, sandpaper
This step determines whether your plants thrive or die. Follow my tested method exactly:

Label Removal: Use warm soapy water and plastic scraper. Those stubborn labels come off easier if you heat the water. Trust me, clean bottles look much better!
Cutting Technique:
- Mark 12cm x 8cm rectangle on bottle side
- Use sharp craft knife (heat it slightly for easier cutting)
- Keep opening size consistent for professional look

Drainage System (Super Important):
- Drill 5-6 holes (5mm) at bottom
- Add 2 overflow holes on sides
- This prevents waterlogging that killed my first batch!
Edge Safety: Sand all cut edges smooth. Plastic edges are surprisingly sharp and can cause cuts during handling.
Pro Selection Tip: Choose thick PET bottles (Bisleri, Kinley type). Avoid thin bottles that crack in Mumbai sun.

Step 2: Mounting Options (Choose Based on Your Situation)
Time needed: 60-90 minutes

Method 1: Hanging System (Perfect for Renters)
- Use 6mm nylon rope (very important – thinner rope breaks!)
- Create adjustable loops at bottle necks
- Maximum 4 bottles per vertical line (weight limit!)
- Space bottles 35cm apart for air circulation
Method 2: Wall-Mounted Brackets
- Mark wall studs first (use stud finder or knock test)
- 8mm expansion bolts for concrete walls
- Install L-brackets every 40cm horizontally
- Create removable grid pattern

Method 3: Wooden Frame (My Personal Favorite)
Perfect for rental apartments where drilling isn’t allowed:
- Use bamboo poles or recycled wood
- Lean-to design against wall/railing
- Completely portable, move anywhere
- Great for experimenting before permanent setup

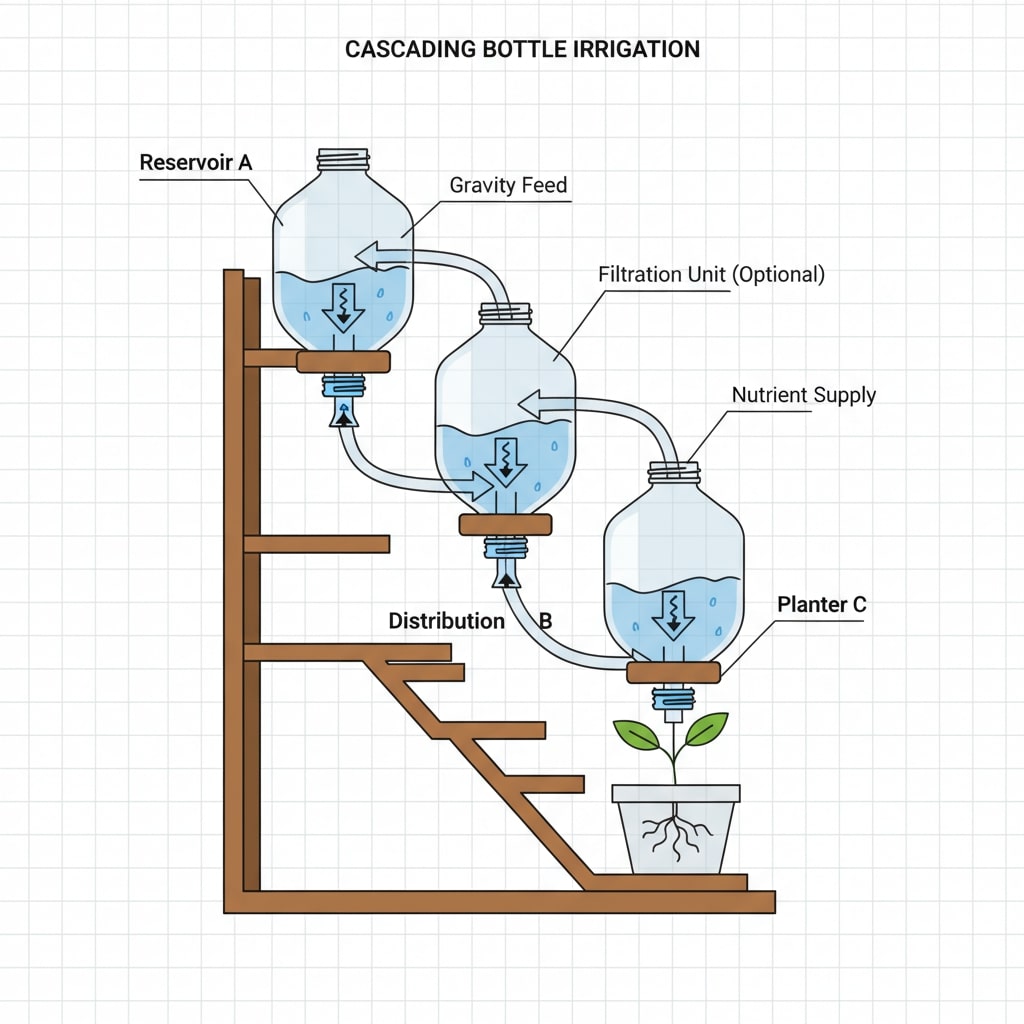
Method 4: Advanced Cascading System
- Connect bottles with small tubes
- Top bottle becomes water reservoir
- Perfect for 12+ bottle installations
- Reduces daily watering time significantly
For detailed structural calculations and professional mounting techniques, check our comprehensive guide on how to build a vertical vegetable garden frame.

Step 3: Planting Strategy That Actually Works
Time needed: 60 minutes
Critical Success Factors:
Soil Level: Leave exactly 3cm space at top. I learned this after soil spilled everywhere during watering!
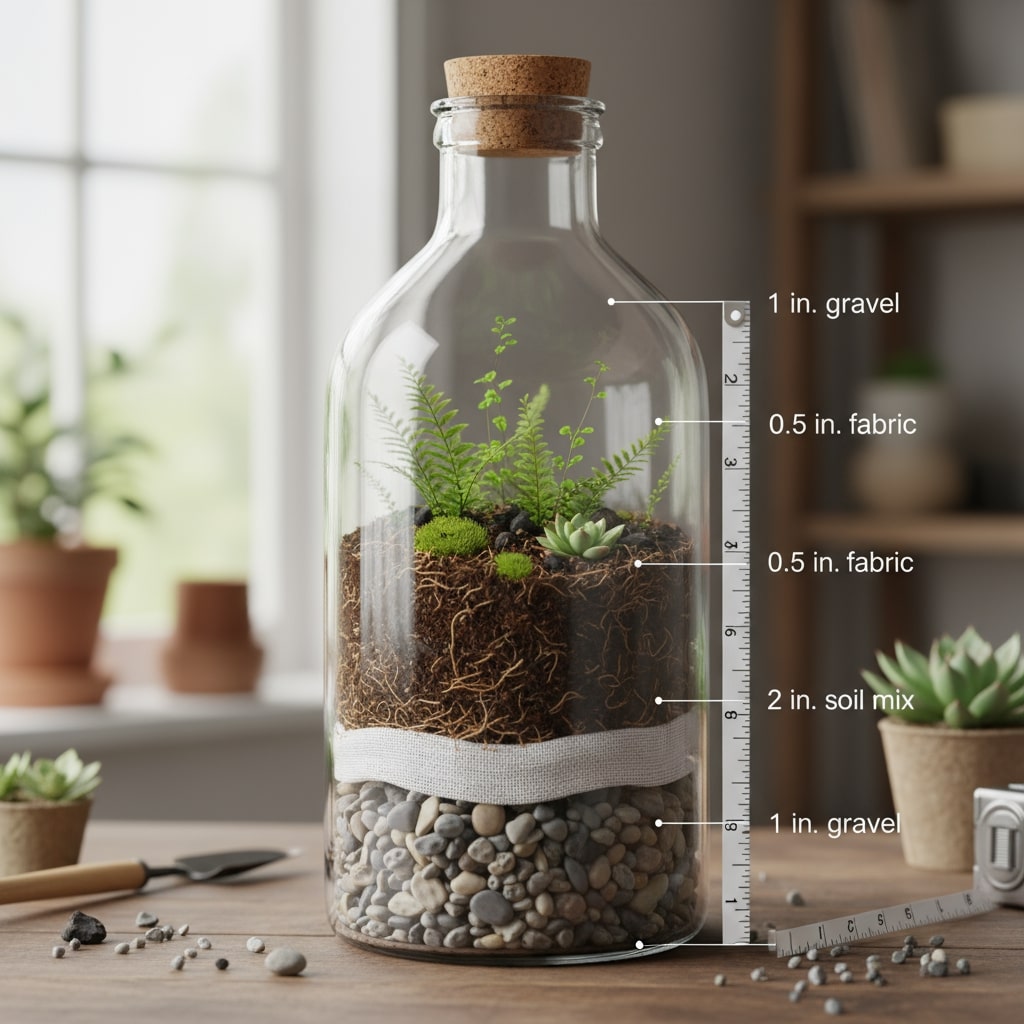
Perfect Layering System:
- 2cm small gravel at bottom (drainage)
- Thin landscape fabric (prevents soil mixing with gravel)
- Your soil mix (fill remaining space)
Root Depth Reality:
- Shallow herbs (mint, coriander): 8-12cm depth is plenty
- Medium plants (spinach, lettuce): Need 12-18cm
- Deep rooted (tomatoes): 20cm+ (use larger bottles or skip them)
Smart Seeding Strategy:
- Plant 3-4 seeds per bottle initially
- Thin to 1-2 strongest seedlings (be ruthless!)
- Succession planting: Sow new seeds every 2 weeks for continuous harvest
Step 4: Mounting and Securing (Safety Critical!)
Time needed: 45-60 minutes

Professional Mounting Techniques:
For Hollow Walls:
- Heavy-duty toggle bolts (those spring-open ones)
- Pre-drill the correct size holes
- Test each anchor with 1.5x expected weight
For Concrete Walls:
- 8mm rawl plugs with galvanized screws
- Use masonry bits, not regular drill bits
- Clean dust from holes before inserting plugs
Anti-Sway Solutions:
Mumbai’s monsoon winds taught me this lesson! Connect bottles horizontally with wire/rope to prevent swaying during storms.

Rental-Friendly Alternatives:
- Heavy-duty Command strips (for herb bottles only)
- Tension rods between opposing walls
- Freestanding A-frame (completely portable)
Safety Test: Before adding soil, test all connections with 150% expected weight. Better safe than sorry!
Step 5: Watering Systems (This Makes or Breaks Success)
Time needed: 30-45 minutes

Manual Watering (Start Here)
- Best tool: Long-spout watering can with flow control
- Technique: Water slowly until you see drainage starting
- Perfect timing: Early morning (6-8 AM) when it’s cool

DIY Automated Drip System (Game Changer!)
This literally changed my gardening life:
Materials needed:
- Large plastic bottle (5L) as a reservoir
- Medical IV tubing (get from pharmacy)
- Drip flow regulators
Setup process:
- Position the reservoir 1 meter above the plants
- Regulate to 1 drip per second
- Clean tubes weekly (algae blocks them)

Cascade Watering Method
- Connect bottles vertically with small tubes
- Water only the top bottle; everything else gets irrigated
- 500ml in the top bottle waters the entire 4-bottle column
Smart Watering Schedule:
- Soil test: Insert finger 3cm deep, water if dry
- Plant signals: Slight morning wilting means thirsty
- Seasonal adjustment: Daily in summer, every 2-3 days in winter

Step 6: Finishing Touches (Make It Beautiful!)
Time needed: 45 minutes

Weather Protection:
- UV-resistant paint: Light colors reflect heat, extend bottle life
- Soil covers: Coconut coir looks natural, prevents moisture loss
- Plant labels: Waterproof tags with sowing dates

Visual Appeal Ideas:
- Group bottles by plant type for organized look
- Add small garden decorations between bottles
- Install a bamboo screen background for a premium appearance
Functionality Upgrades:
- Small harvest containers attached to the frame
- Dedicated tool storage spots
- Growth tracking markers on bottle sides.
Best Plants for Indian Bottle Gardens (Tried and Tested)
After killing many plants and succeeding with others, here’s what actually works:

Top Level (6-8 Hours Direct Sun):
These plants love heat and produce amazing results:
- Cherry tomatoes: 45-60 days to harvest, perfect for Indian climate
- Green chilies (हरी मिर्च): Continuous harvest after 60 days
- Bell peppers: Take 70-80 days but high-value crop

Middle Level (4-6 Hours Sun):
The reliable performers that never disappoint:
- Mint varieties (पुदीना): Ready in just 21 days, grows like crazy
- Coriander (धनिया): Both leaves and seeds usable, 30-45 days
- Holy basil (तुलसी): Medicinal properties, natural pest repellent
- Spinach (पालक): Cool season crop, very nutritious
- Lettuce: Multiple varieties, cut-and-come-again harvesting

Bottom Level (2-4 Hours Partial Shade):
These survive in less-than-ideal conditions:
- Fenugreek (मेथी): Both leaves and seeds useful
- Money plant: Air purification, zero maintenance
- Small ferns: Just for beauty and humidity control
Succession Planting Schedule: Plant new seeds every 15 days for continuous supply. This is how you get herbs year-round!
For detailed plant care specific to your region, explore our guide on best vegetable plants for terrace garden with climate recommendations for all Indian cities.
Beginner’s Progression Plan:
- Week 1: Start with easy herbs (mint, coriander)
- Week 3: Add leafy greens once you’re confident
- Week 6: Try fruiting plants after mastering basics

4-Week Maintenance Schedule (Learn from My Experience)

Week 1: Critical Establishment (Don’t Skip This!)
Daily tasks:
- Check soil moisture twice daily (morning and evening)
- Water when top 2cm feels dry
- Watch for transplant shock signs
Every 3 days:
- Diluted liquid fertilizer (1:10 ratio)
- Check for yellowing leaves
What to expect: Some plants may look sad initially – this is normal!
Week 2: Root Development Magic
Daily watering: Reduce to once daily, deeper sessions
Plant care: Remove weaker seedlings, keep strongest ones
Pest watch: Check leaf undersides for early pest signs
Support: Install small stakes for tall plants

Week 3: Active Growth Excitement
First harvest: Start picking outer leaves of herbs
Weekly feeding: Apply compost tea (homemade or store-bought)
Pruning: Pinch herb flowers to maintain leaf production
Planning: Prepare additional bottles for succession planting
Week 4: Full Production System
Regular harvesting: Pick frequently to encourage growth
Nutrient monitoring: Yellow leaves mean fertilizer needed
Pest management: Weekly neem oil spray as prevention
Record keeping: Note what works for your specific conditions

Common Beginner Mistakes (I Made Them All!)

Mistake 1: Overwatering Obsession
What I did wrong: Watered every day regardless of weather
The fix: Check soil moisture first – plants drown more often than they die of thirst
Warning signs: Yellow leaves, musty smell, fungal growth
Mistake 2: Overcrowding Bottles
My error: Planted 6 seeds thinking “more is better”
Reality check: Maximum 2 plants per bottle, be ruthless when thinning
Result: Weak plants, poor harvest, disease problems

Mistake 3: Wrong Sunlight Assessment
Assumption: Morning sun means full-day sun
Truth: Track actual hours throughout the day
Plant needs: Herbs minimum 4 hours, vegetables 6+ hours
Mistake 4: Ignoring Seasons
My error: Same care routine year-round
Smart approach: Adjust watering, fertilizing, and plant selection based on weather
Planning: Different plants for different seasons
Advanced Watering for Multiple Bottles
Cascading Drip Connection System

Shopping list:
- Clear plastic tubing (6mm) – ₹50/meter
- Drip flow regulators – ₹20 each
- T-connectors for branching – ₹15 each
Installation Steps:
- Main reservoir: 5-10L container positioned 1m above plants
- Primary distribution: Main tube connects to top bottle row
- Secondary branching: T-connectors distribute to individual bottles
- Flow control: Adjustable drippers for each bottle
- Overflow management: Vertical connections for excess water
System Benefits:
- Time saving: 15 minutes vs 45 minutes manual watering
- Consistency: Even moisture distribution
- Vacation-friendly: 3-4 day automated operation
- Water efficiency: 30% less water usage
Seasonal Care for Indian Climate

Summer Survival Mode (March-June):
Temperature management: 40% shade cloth during brutal 12-4 PM heat
Watering strategy: Early morning (5-6 AM) and evening (7-8 PM)
Plant protection: Mulch soil surface to reduce evaporation
Pest alert: Spider mites and aphids multiply rapidly in heat
Smart varieties: Focus on heat-tolerant mint and basil
Monsoon Growth Boost (July-September):
Drainage priority: Check drainage holes weekly, no water stagnation!
Disease prevention: Neem spray every 10 days, improve air flow
Wind safety: Secure against strong winds, check mounting regularly
Harvest peak: Maximum growth period, pick regularly
Winter Golden Period (October-February):
Perfect conditions: Ideal temperature and humidity for most plants
Expansion time: Add cool-season lettuce, peas, radish
Reduced watering: Every 2-3 days sufficient
Planning time: Collect seeds, plan next year’s expansion
Troubleshooting Guide (Visual Problem Solving)
| Problem | What You See | Why It Happens | Quick Fix | Prevention |
|---|---|---|---|---|
| Yellow leaves | Lower leaves turning yellow | Overwatering or nutrient deficiency | Reduce watering, add compost | Proper drainage, balanced fertilizer |
| Stunted growth | Plants not growing despite care | Poor soil quality or insufficient light | Replace soil, move to brighter spot | Quality soil mix, sun tracking |
| Pest infestation | Visible insects, damaged leaves | Poor air circulation, stressed plants | Neem oil spray, increase spacing | Weekly inspection, companion planting |
| Root rot | Black mushy roots, bad smell | Waterlogged soil, poor drainage | Remove affected plants, improve drainage | Proper drainage holes, well-draining soil |
| Wilting with wet soil | Plants drooping despite moist soil | Fungal infection or root damage | Reduce watering, antifungal treatment | Good air circulation, avoid overwatering |
| Slow germination | Seeds not sprouting after 10 days | Old seeds or wrong temperature | Fresh seeds, optimal temperature | Proper seed storage, temperature control |
Real Cost Analysis and Money-Saving Strategies

Complete Cost Reality for 1m x 1m Panel (12 bottles):
Budget Setup (₹400-500):
- 12 bottles: Free collection
- Basic soil mix (15kg): ₹250
- Seeds: ₹100
- Rope/mounting: ₹100
- Basic tools: ₹50
Quality Setup (₹750-950):
- Add: Drip irrigation (₹200)
- Organic fertilizers (₹150)
- Premium seeds (₹100)
Premium Setup (₹1200-1500):
- Add: Timer system (₹300)
- Decorative elements (₹200)
- Weather protection (₹150)
Maximum Money-Saving Strategies:
- Bottle collection networks: Partner with offices, schools for bulk collection
- Seed saving program: Collect from mature plants for next season
- Kitchen composting: Save ₹150/month on fertilizers
- Community tool sharing: Reduce individual costs by 60%
Recommended Products That Actually Work
| Product | Price Range | My Rating | Best For | Where to Buy |
|---|---|---|---|---|
| Organic Potting Mix (15kg) | ₹250-400 | ⭐⭐⭐⭐ | All plants | Buy on Amazon.in |
| Vermicompost (5kg) | ₹150-250 | ⭐⭐⭐⭐⭐ | Nutrient boost | Buy on Amazon.in |
| Drip Irrigation Kit | ₹300-500 | ⭐⭐⭐⭐ | Automated watering | Buy on Amazon.in |
| Neem Oil Spray | ₹80-120 | ⭐⭐⭐⭐⭐ | Pest control | Buy on Amazon.in |
| Waterproof Plant Labels (50pcs) | ₹150-200 | ⭐⭐⭐⭐ | Buy on Amazon. in | Buy on Amazon.in |
Transparency Note: These affiliate links help support our content creation at no extra cost to you. I only recommend products I actually use.
Complete FAQ Section (Real Questions, Real Answers)
Q: Which bottle types work best and are safest for food?
A: Use 2-liter PET bottles with thick walls (Bisleri, Kinley type). Avoid bottles marked with recycling codes 3, 6, or 7 – stick to code 1 for food safety.
Q: What’s the real cost for a complete setup in India?
A: Basic setup costs ₹400-500 including soil, seeds, and mounting. Enhanced versions with drip irrigation run ₹750-950. Premium setups reach ₹1200-1500.
Q: How often should I really water bottle gardens?
A: Check daily but only water when top 2cm of soil feels dry. Usually every 1-2 days in summer, every 2-3 days in winter. Overwatering kills more plants than underwatering!
Q: Will bottle gardens survive monsoon season?
A: Absolutely yes, with proper drainage holes and reduced watering frequency. Provide wind protection and ensure bottles can’t get waterlogged during heavy rains.
Q: How long before I can harvest fresh herbs?
A: Mint and coriander are ready in 21-30 days. Leafy greens take 30-45 days. Tomatoes need patience – 60-90 days but worth the wait!
Q: Is my balcony strong enough for bottle gardens?
A: Standard Indian apartment balconies handle 300-400 kg/m². A 12-bottle setup weighs just 35-40kg – well within safe limits. Distribute weight properly.
Q: Are plastic bottles safe for growing edible plants?
A: Food-grade PET bottles (marked with recycling code 1) are completely safe for edibles when not exposed to extreme heat above 60°C. Avoid black bottles in direct sun.
Pro Tips from 2 Years of Experience

Advanced Growing Techniques:
Soil Regeneration Magic: Instead of replacing all soil, add 20% fresh compost every 3 months. This saves money and maintains soil biology.
Smart Companion Planting: Place marigold plants in every 4th bottle – they naturally repel pests and look beautiful too.
Succession Harvesting System: Plant new seeds every 15 days in rotating bottles for continuous supply. Never run out of fresh herbs!
Seed Saving Mastery: Let your healthiest plants go to seed, collect and dry properly for next season. Free seeds forever!
Microgreen Production: Use smaller bottles for quick 7-14 day microgreen harvests. Great for adding to salads and sandwiches.
Propagation Techniques: Root basil and mint cuttings in water, then transplant for instant new plants. Multiply your garden for free!
Efficiency Life Hacks:
Batch Processing: Prepare multiple bottles simultaneously – much more efficient than doing one at a time.
Weather App Integration: Use smartphone weather apps to predict watering needs based on temperature and humidity.
For advanced vertical gardening techniques and space optimization strategies, check our comprehensive guide on how to make vertical garden in balcony.

Your Garden Success Story Starts Now
Your plastic bottle vertical garden represents much more than just a weekend DIY project. It’s your personal step toward sustainable living, food security, and that incredible satisfaction of eating vegetables you grew yourself.
From my personal experience over two years, the biggest joy comes from those small everyday moments. Plucking fresh mint leaves for your morning tea. Adding homegrown coriander to your dal. Sharing extra herbs with neighbors who start asking, “How did you grow this?”
The taste difference is incredible – there’s simply no comparison between store-bought herbs and ones you harvest minutes before cooking.

Remember, every gardening expert started as a complete beginner who killed their first few plants. Start small, learn from mistakes, and celebrate small victories. Within months, you’ll have neighbors and friends asking for your “secret” to growing amazing herbs in tiny spaces!
The journey from empty bottles to fresh herbs on your dining table is incredibly rewarding. Your future self will thank you for taking this first step toward sustainable, healthy living.
About Your Gardening Guide
Zaid Ansari is an urban gardening enthusiast who transformed his passion for plants into practical solutions for Indian apartment dwellers. After successfully growing over 30 different plant varieties in his compact Mumbai apartment balcony, he now helps thousands of urban Indians create their own productive food gardens.
Expertise Areas: Vertical gardening systems, Indian climate adaptation, small-space optimization, budget-friendly gardening solutions
Follow for more: How to make vertical garden in balcony | Weekly gardening tips, seasonal plant recommendations, and urban farming solutions for Indian conditions.